

How To Download Skins For Rainmeter
Installing Skins
There are 2 ways of installing Rainmeter skins downloaded from the internet:
- Automatically : If the peel is in the .rmskin format.
In short : Double-click the .rmskin file, click Install. - Manually : If the file is a .goose egg/.rar/.7z archive.
In short : Unzip the archive to the Rainmeter Skins folder. Refresh Rainmeter.
Installing Automatically
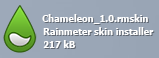
Skins in the Rainmeter Peel Packager (.rmskin) format tin can exist easily and automatically installed with the Rainmeter Skin Installer. During a normal Rainmeter installation, the .rmskin extension is associated in Windows with the Skin Installer program, and simply double-clicking the file will install it in Rainmeter.

This dialog lists each component that will exist installed. These may include:
- Skins : At least one peel will e'er be included and installed in the Rainmeter\Skins folder. The author of the parcel may indicate that i or more skins will automatically be loaded when the installation is consummate.
- Layouts : If the writer has added a layout to the packet it will exist installed in the Rainmeter\Layouts binder. If Apply included layout is selected, the layout will be applied to Rainmeter post-obit installation.
- Plugins : If the author has added custom plugins to the package the appropriate 32bit/64bit architecture version of the plugin .dll files will be installed to the Rainmeter\Plugins folder.
Legacy .rmskin format components. No longer supported in new Rainmeter two.iv .rmskin files:
- Fonts : If an author has included font files with the package, they volition be installed in the Windows\Fonts folder. This may be disabled by unchecking Install fonts to system in the Advanced pull-downwardly carte du jour.
- Addons : If an writer has included addon executable files with the package, they volition be installed in the Rainmeter\Addons folder.
If whatsoever of the skins to be installed already exist, they will be moved to a Fill-in folder before installation. This may be disabled by unchecking Backup skins in the Advanced pull-downwardly menu.
Click Install to consummate the installation of the bundle.
Note: If Rainmeter is existence run as a portable installation, start SkinInstaller.exe from the Rainmeter plan binder, and browse to the .rmskin file to install it.
Installing Manually
Before Rainmeter i.three, almost skins had to be unzipped and moved to the Skins folder by hand. All versions of Rainmeter are 100% backwards-uniform, then these older skins will still work but fine. Here is how to install them:
Showtime of all, if a pare comes in an archive, such as a Zippo, RAR or 7Z file, software is needed to "extract" them. seven-Zip is 1 of the popular choices, since information technology can handle nigh whatever annal type. Subsequently installing the software, right-click the archive in Explorer to extract it.
The archive may include a readme.txt file with further instructions. If not, await for a binder with the same name as the skin - it might be inside another folder that is actually called "Skins". Move the folder to the Rainmeter "Skins" binder:
C:\Users\YourName\Documents\Rainmeter\Skins ane
1. "YourName" is an example.
Finally, right-click the Rainmeter Windows Notification area icon and select Refresh all. The new skins will now be available to load from the Manage window or context menus.
Source: https://docs.rainmeter.net/manual/installing-skins/
Posted by: fletcheraciectur1965.blogspot.com
0 Response to "How To Download Skins For Rainmeter"
Post a Comment